7 Installation Mistakes That Could Put Your Child at Risk in a Britax ClickTight Seat
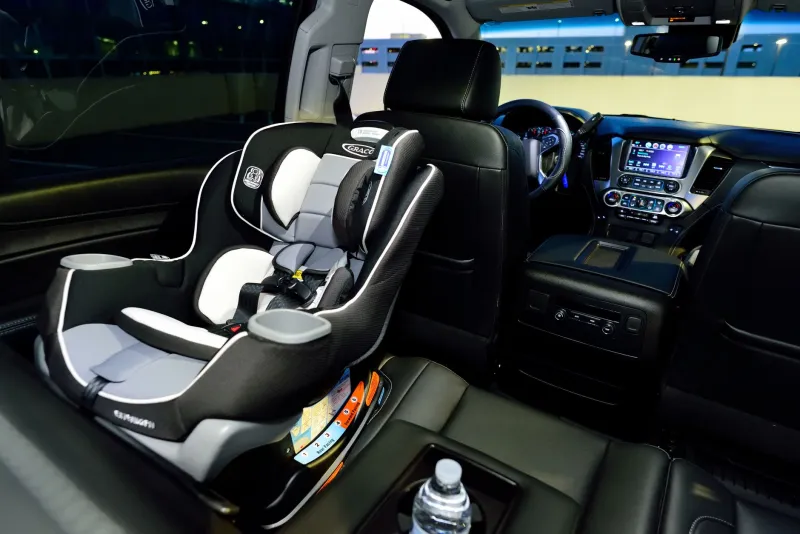
Britax designed the ClickTight installation system with a clear goal: make it harder for parents to install a convertible car seat incorrectly. The mechanism — which routes the vehicle seat belt directly through a locked compartment in the seat base — has genuinely reduced certain types of installation error. But it has not eliminated them. Certified Child Passenger Safety Technicians (CPSTs) across the United States continue to document a consistent set of mistakes that occur even with this simplified system, and some of those errors carry serious safety consequences.
This article does not exist to alarm you. These mistakes are common, they are understandable, and — most importantly — every single one of them is fixable. What matters is that you identify and correct them before your next drive.
Why Correct Installation Is as Important as Recall Status
At Britax ClickTight Recall Hub, our focus is on keeping families informed about product safety — and installation correctness is inseparable from that mission. A seat that is free of any recall defects can still fail to protect a child if it is installed improperly. According to NHTSA, an estimated 46% of car seats are used incorrectly in some way. For convertible seats specifically, the rate of misuse remains stubbornly high despite improvements in seat design.
With that context established, here are the seven installation errors that CPSTs most commonly observe with Britax ClickTight convertible car seats.
Mistake #1: Failing to Hear — and Confirm — the Audible Click
What happens: The ClickTight system's defining feature is its audible and tactile confirmation that the seat belt is properly secured. Many parents route the belt through the ClickTight compartment and close the lid without verifying that the locking mechanism has fully engaged. A partially closed lid may appear secure at a glance but will not provide the intended restraint during a crash.
Why it matters: Without full engagement, the seat belt can migrate within the compartment, introducing slack that allows the seat to shift significantly upon impact.
How to fix it: After routing the seat belt through the ClickTight compartment, close the lid firmly and listen for a distinct click. Then tug the seat belt strap sharply — it should not release or move. Additionally, attempt to rock the seat forward, backward, and side to side at the belt path. Movement greater than one inch in any direction indicates the belt is not fully locked.
Mistake #2: Using the Wrong Seat Belt Routing Path
What happens: Britax ClickTight seats have separate belt routing paths for rear-facing and forward-facing installation. Parents who convert the seat from one orientation to the other sometimes route the vehicle seat belt through the incorrect channel — a mistake that is easy to make if you are working quickly or did not consult the manual during the transition.
Why it matters: Incorrect belt routing can dramatically alter the forces transmitted to the seat during a crash, potentially causing the seat to rotate or translate in ways it was not engineered to handle.
How to fix it: Before every installation — especially after changing the seat's orientation — open the instruction manual to the diagram page for your specific configuration. Confirm that the belt is routed through the path labeled for rear-facing or forward-facing use, as applicable. If you no longer have the physical manual, download a digital copy from Britax's official website using your seat's model number.
Mistake #3: Incorrect Harness Slot Height for the Child's Size
What happens: The harness on a convertible car seat must be threaded through slots that correspond to your child's current shoulder height. Many parents set the harness height correctly at purchase and then neglect to adjust it as their child grows. Others set it too low or too high from the outset.
Why it matters: In rear-facing mode, harness straps should sit at or below the child's shoulders. In forward-facing mode, they should sit at or above the shoulders. Straps that are too low in forward-facing mode can allow the child to ride up and out of the harness during a frontal collision. Straps that are too high in rear-facing mode can fail to keep the child properly contained.
How to fix it: With your child seated normally in the harness, check where the straps exit the seat shell relative to the tops of their shoulders. Adjust the harness slot height according to the instructions in your Britax manual. Note that re-threading the harness through a new slot requires completely removing and re-routing the webbing — do not attempt shortcuts. When in doubt, visit a local CPST inspection station for a hands-on evaluation.
Mistake #4: Harness Straps That Are Too Loose
What happens: This is one of the most universally common car seat errors documented by CPSTs nationwide. Parents often leave the harness straps looser than they realize, sometimes because a bulky coat or thick clothing makes the fit feel snug enough.
Why it matters: Loose harness straps allow the child to move forward excessively during a crash before the harness begins to absorb energy. This increases the risk of contact injuries and reduces the harness's ability to distribute crash forces across the strongest parts of the child's body.
How to fix it: After buckling the harness chest clip, attempt to pinch the webbing at the child's collarbone between your thumb and forefinger. If you can gather any slack, the harness is too loose. Tighten the adjuster strap until the pinch test yields no excess webbing. Also ensure your child is not wearing a heavy winter coat — bulky outerwear should be removed before buckling; a blanket can be placed over the harness afterward if warmth is needed.
Mistake #5: Chest Clip Positioned Too Low
What happens: The harness chest clip is frequently positioned at the abdomen rather than at armpit level. This placement error is so common that it appears consistently in NHTSA misuse surveys across all car seat brands.
Why it matters: The chest clip is not a load-bearing crash restraint — it is a positioning device. Its job is to keep the harness straps properly spaced across the child's chest. When placed too low, it can cause serious abdominal injury in a crash as the harness forces concentrate at the wrong anatomical location.
How to fix it: After buckling the harness, slide the chest clip upward until it rests at armpit level — roughly even with the child's underarms. The clip should never rest on the soft tissue of the abdomen.
Mistake #6: Installing on an Angled or Uneven Seat Surface Without Adjusting the Recline
What happens: Vehicle rear seats vary considerably in their angle and cushion firmness. Parents who install a ClickTight seat on a steeply angled or very soft vehicle seat sometimes skip the recline adjustment step, leaving the seat pitched too upright or too far back.
Why it matters: For rear-facing infants and toddlers, the seat must be reclined to a specific angle to prevent the child's head from falling forward and obstructing the airway. For forward-facing children, excessive recline can reduce the effectiveness of the harness. Britax ClickTight models include built-in recline indicators and adjustable recline legs specifically to address this variable.
How to fix it: Locate the recline indicator bubble level on your specific ClickTight model — its position is identified in your manual. Adjust the recline foot or base until the bubble rests within the acceptable zone for your child's current seating direction. If your vehicle seat cushion is particularly soft, rolling a tightly bound pool noodle or a firm foam wedge under the front of the car seat (forward of the vehicle seat belt path) can help achieve the correct angle — this practice is specifically approved by Britax for their ClickTight models.
Mistake #7: Skipping the Post-Installation Shake Test
What happens: After completing installation, many parents consider the job done. They do not perform a final verification check to confirm the seat is secure in the vehicle.
Why it matters: A seat that appears properly installed may still have subtle slack in the belt path or an incompletely engaged ClickTight latch. The only way to confirm security is to physically test it.
How to fix it: Grip the car seat at the belt path — not at the top of the seat — and attempt to move it firmly forward, backward, and side to side. Per NHTSA guidelines, movement should not exceed one inch in any direction. If the seat shifts beyond that threshold, re-examine your belt routing, confirm the ClickTight latch is fully engaged, and repeat the tightening process.
When to Seek Help From a Certified Professional
If you have worked through these corrections and still feel uncertain about your installation, do not guess. A certified Child Passenger Safety Technician can inspect your seat at no charge at inspection stations located throughout the United States. Find your nearest location through the NHTSA inspection station search tool at nhtsa.gov/equipment/car-seats-and-booster-seats.
Proper installation and recall awareness work together. A seat with a clean recall record that is installed incorrectly offers your child far less protection than it was designed to provide. Take the time to get both right.